
 https://cannabisexaminers.com/wp-content/uploads/2020/01/weed-2-scaled.jpg
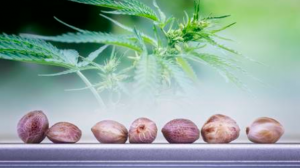
The first stage of cultivation occurs once the embryo of a chosen marijuana seed is open and starts to produce a root. The root sinks into the soil and pushes the young seedling up. Two embryonic leaves bloom outwards from the seedling to receive daylight and push its shell off.
In general, growing marijuana is easy as growing grass, it takes from twelve hours to three weeks for a marijuana seed to germinate. Once the plant has attained this degree, it conforms within the seedling phase.
Seeds can be grown in several methods. Some methods guarantee higher success than others.
- Seed towel propagation
Seed towel propagation is a process whereby the seeds are stored either on a moist cloth or a wet lump of cotton cloth. Cheesecloth may likewise be applied. The seed is then treated with an extra damp cloth or a damp towel. The towel or cloth must be retained moistened at all times. The seeds may damage if the material dries out it.
Check every day to examine if the seeds have begun to produce any roots. If they provide, then promptly relocate the seedlings to a growing medium such as soil handling with a pair of tweezers. Do not touch the root. This method has a reasonable success rate. Out of ten seeds, eight to nine seeds may germinate.
The complexity with this procedure is that sometimes the transplanting can induce the seedlings to go into shock. The shocking of the seedlings can stop the germination process leaving you with emptiness. With training, you can make all your seeds germinate.
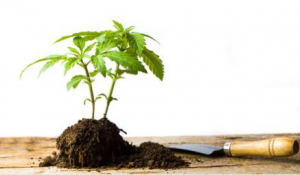
- Seed-soil propagation
Seed-soil propagation is a process in which the seeds are planted down in the wet soil about three milliliters or the portion of the seed from the surface. The soil is maintained and moistened by sprinkling water over it once a day. This method has an average success rate. Out of ten seeds, only seven to eight seeds may germinate.
- Propagation kits
Using a propagation kit is a technique whereby the seeds are planted in the little unit, called a seed or clone propagator, which is devised to help plants germinate. Some of those assortments can be heated and look like a small nursery. At the base of the plate is a tiny space where water is poured.
Tiny grow cubes are placed into the holes in the tray, which automatically sets the grow cubes into the solution. The seeds are planted into little holes in the cubes, and the cover is later placed back on the block.
This method has a notable high success rate. The drawback to this procedure is that it needs to consume money on the tray, cubes, and grow fertilizers if you have spent on seeds then why not spend additional on purchasing a small kit commonly similar to this. Another benefit is that you can adopt this same plate to accommodate the roots of your clones.
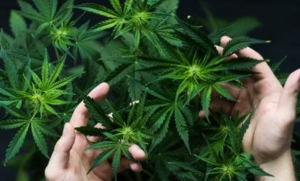
The Vegetative Stage
Once your plant has produced her first primary leaves, she will continue to do so, generating leaf and branch in sequence. If your environment is finely tuned up, these notes should be looking nice and close to one another, which is perfect! Your future buds will be beautiful and dense. Usually, apart from auto-flowering seeds, you have control on how long it persists. As long as you retain the light cycle in 18hours of light and 6hours of night, they will linger in this stage.
The Stretch and Pre-flowering
What people call “the stretch” is the two weeks after switching light periods. During these two weeks, your plant will have robust growth, up to 200% for the usual extreme strains. You will also notice the bud sites to appear, rising with pistils and growing into small budlets.
Just like a youngster, she’s going to lose some fits, and you won’t recognize what comes out of it. By the end of this phase, she will start producing some small flowers on her. You can begin seeing them with hair like strands developing at the intersection of your branches.
By the completion of the stretch, your plant will have stopped the vegetative growth entirely and will have developed all her bud locations. If you went for a scrog, this could also be an exceptional time to get rid of the weak branches that don’t look too assuring.
Harvesting, Drying and Curing the flowers
Before drying your harvest you’ll need to exclude as many leaves as possible from the plant. You just need to keep the flowers, and maybe the petite leaves near them that are composed of trichomes.
Drying and curing your marijuana buds is just as critical as the whole growth cycle. Mess up here and, at best, you’ll have unsavory weed. To dry your buds you’ll want to dangle them in a dark place for about ten days before commencing the cure period, and that’s where all the enchantment happens.
You can visualize curing like when a whiskey or wine is in the barrel for several years to improve its taste. With marijuana, it’s the same and can last from 2 weeks in the right conditions. The practices are pretty simple; at first, you want to let the moisture go out the container, by opening it several hours a day, to avoid mold.
Bottom Line
Once the buds are dried, you’ll need to keep constant humidity levels to prevent them from withering up too much, giving you some undusted buds. Select the finest buds, grind, roll a joint, and smoke!!!